Categories Bathroom

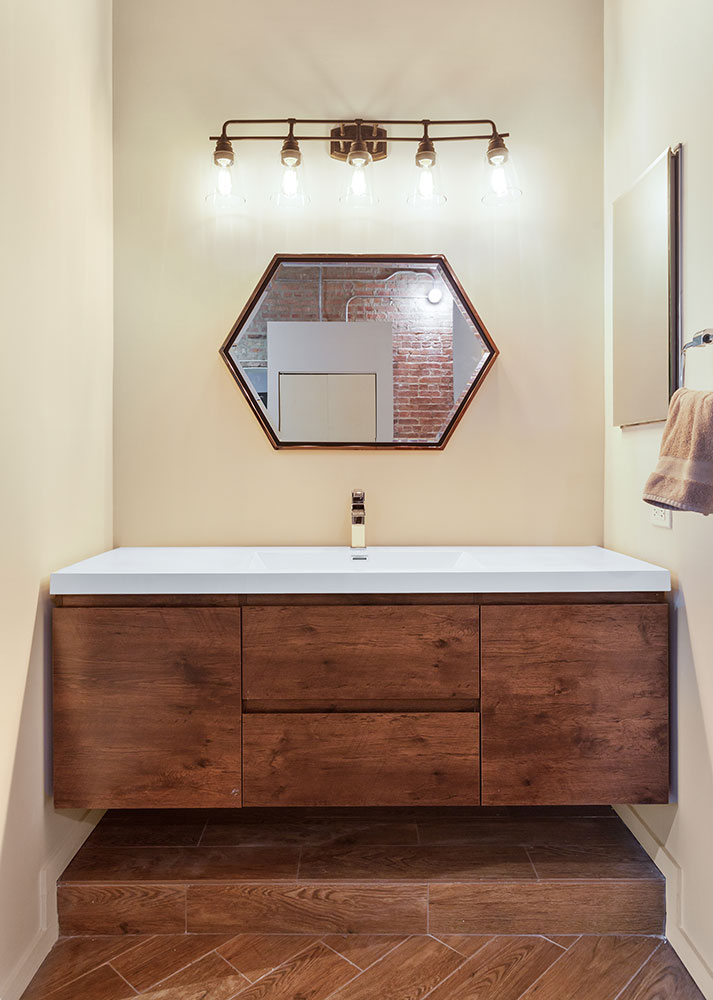
5 innovative ideas for bathroom remodeling in Chicago for 2024

Certainly! Here are five innovative ideas for bathroom remodeling in Chicago for 2024:

  1. Smart Bathroom Technology Integration:
    • Incorporate smart devices such as motion-sensor faucets, smart mirrors with built-in LED lighting and touchscreen interfaces, and voice-activated shower systems.
    • Install smart toilets with features like bidet functionality, heated seats, and automatic flushing to enhance comfort and hygiene.
  2. Eco-Friendly Upgrades:
    • Implement water-saving fixtures like low-flow toilets, aerated faucets, and efficient showerheads to reduce water consumption and lower utility bills.
    • Use sustainable materials for flooring, countertops, and cabinetry, such as bamboo, reclaimed wood, or recycled glass, to minimize environmental impact.
  3. Spa-Inspired Design:
    • Create a luxurious spa-like atmosphere with features such as a large walk-in shower with multiple showerheads, a freestanding soaking tub, and heated flooring.
    • Incorporate natural elements like stone tiles, wood accents, and plants to evoke a sense of tranquility and relaxation.
  4. Accessibility and Universal Design:
    • Design the bathroom to be accessible for people of all ages and abilities, incorporating features such as curbless showers, grab bars, and adjustable-height vanities.
    • Choose slip-resistant flooring and wide doorways to ensure safety and ease of use, particularly for individuals with mobility challenges or disabilities.
  5. Statement Lighting and Fixtures:
    • Install stylish and energy-efficient lighting fixtures, such as pendant lights, wall sconces, or LED strips, to create ambiance and highlight architectural features.
    • Choose statement-making faucets, hardware, and accessories in bold finishes like matte black, brushed gold, or polished nickel to add visual interest and personality to the space.

These ideas combine functionality, style, and sustainability to create a modern and inviting bathroom environment that reflects the latest trends in design and technology.

Categories Bathroom

Sink Your Hands into Measuring a New Sink for Your Bathroom Remodeling Project

A sink is simply a bowl. A bowl with pipes and gaskets and washers, screws and valves and connectors, and hopefully a faucet that correctly distributes hot water on the left, and cold water on the right – with the proper faucet handle initials indicating so. Of course, this “bowl” is more appropriately referred to as a basin – but the sink doesn’t really care what it is called. For those of you that are looking for a creative outlet to wash your hands in, open your eyes to every bowl shaped object. Your preferences for size, material and design can be more particularly satisfied with a little imagination and some skillful cutting work.

Before you hire a professional stone-cutter to modify your intricately-patterned Italian Marble sink, take a realistic look at the sink measurements – and the unique physical measurements of each member of the family that will be using the sink. If a short family member and a tall family member are sharing a sink, a tall deep bowl will be awkward for one, and a long shallow bowl may be awkward for the other. Picture all family members washing their face and hands, brushing their teeth, and peering over the sink to see if that razor stubble has come in or where the latest wrinkles have surfaced. Does one splash cold water from the faucet onto their face, practically swimming in the sink, while the other gracefully dampens a corner of a washcloth and brings it up to the face? You don’t want any heads hitting the faucet fixture, and you don’t want water all over the bathroom counter. If your kids dump their goldfish bowl into the bathroom sink for cleaning, or you use your bathroom sink for hand-washing delicates, make sure these tasks can be comfortably managed without strain or damage. Size and design should be enjoyable for all bathroom users to face first thing in the morning – often before that first cup of coffee.

Whether you choose to remodel your bathroom with a hand-picked specialty basin, or you’re just browsing through your local retailer for a traditional sink – make sure you measure to keep your morning bathroom visits a pleasure.

Categories Bathroom

Home Remodeling for Generations of Safety in the Bathroom

Bathroom safety is a generational need. It’s obvious why household accidents frequently occur in the bathroom where we are most vulnerable. Water splashes out of the bathtub onto the floor, footprints of water track from the shower to the sink. Bathroom fixtures and floors are rock hard – a nightmare during a fall. Those who have to get dressed in the bathroom have to do balancing acts around solid fixtures and wet floors – likely while dancing to a favorite tune on plugged-in iPod speakers while waiting for electrical hair-styling accessories to heat up.

Slippery floors and solid fixtures affect all generations. Infants are held, washed and lifted with slippery hands begging for a third hand to grasp a nearby towel. Energetic children test their diving skills in a bathtub-turned-swimming pool. Sibling arguments over a bathroom sink or mirror can turn into push and shove matches over hard ceramic tiles and concrete floors. Tree-climbing school children and sports-active teenagers might have to deal with an injured arm or broken leg in their bathroom routines. Shower doors and entry doors open and close simultaneously as working adults rush to prepare for the outside world. And of course, as old age and arthritis sets in, it becomes more difficult to balance, bend and move.

The National Kitchen and Bath Association (NKBA) has design recommendations for safety. If you are contemplating an add-on bathroom or a complete remodel, these recommendations can get you started in the right direction by helping you determine the minimum amount of space you will need. (Very useful if you’re eying that walk-in closet to see if you can transform it into an extra bathroom.)

Many of the NKBA’s recommendations suggest minimum measurements between fixtures. Start locating twenty-one inches on your tape measure. The NKBA recommends at least 21” of space in front of lavatories – 21” space in front of toilets, and 21” of space in front of the bathtub. They also suggest an entryway of 32” wide, and shower enclosures to measure at least 32” by 32” with a shower head at least 72” high.

Door placement is a serious remodeling consideration for any room – and shower doors are no exception. Make sure the shower door opens into a room, and not into the shower enclosure. If someone is hurt, you need to get them out fast without knocking them unconscious while you’re opening the door. Also make sure a shower door and entryway door aren’t going to collide. For added safety, especially if you have young boisterous children, make sure the shower door is made from safety glass. If you have an older home with original installations – it’s probably not safety glass.

The NKBA also suggests that showers have a bench or footrest installed. Not only does this provide support when shaving and washing the lower legs, but if someone starts to get dizzy or lightheaded it’s easy to sit down. There should always be slip-resistant flooring in the shower, bath and throughout the whole bathroom.

If you’re not doing a complete bathroom add-on or major remodeling project, an easy to to prevent accidents is to install a grab bar in the bathtub, shower, and by the toilet. To further prevent bathtub accidents, make sure that bathtubs are installed with faucets that are easy to access from outside the bathtub. To prevent scalding (if you can’t or are not willing to turn down your hot water tank temperature), install a shower head with a pressure-balancing temperature regulator that keeps the hot and cold water balanced.

Bathroom remodelers seeking counter space should consider NKBA’s recommendations of a 6” minimum between the edge of a toilet and side counter. And, although it’s obvious that toilet paper should be easy to reach – they do recommend the toilet paper holder to be 26” off the ground. They do not, however, have recommendations on whether the toilet paper should be unrolled from over the top of the roll or from underneath. That’s for you and your spouse to argue about.

Bathroom remodeling for safety is an investment that will last through generations. You might not be able to stop siblings from elbowing each other over the bathroom sink, but you can make sure you’ve done your best to protect them. Soak in some safety recommendations before you start soaking in your new tub, and plan on remodeling your bathroom with safety measures that can protect your family for generations.

Categories Bathroom

It’s Not You – It’s Your Bathroom Medicine Cabinet

You might think that you’re bored looking at the same old face every day, but maybe you’re just bored with your bathroom medicine cabinet that harbors the mirror looking straight back at you. If you don’t have the time or money for a major bathroom overhaul, or aren’t in a position to start pulling sinks and toilets out of the way, take a small first step and replace your bathroom medicine cabinet.

No matter what bathroom you’re in, a medicine cabinet will not go unnoticed. Whether you like it or not, a bathroom medicine cabinet is a visual focal point of the bathroom. You might as well install a medicine cabinet that smiles back at you every morning. It’s a relatively easy job, even for the beginning home remodeler. However, if your current or new bathroom medicine cabinet includes wiring for lights, keep in mind that you will have to deal with the electrical requirements of the job.

Bathroom medicine cabinets are available to be surface attached or recessed into the bathroom wall. If you have a surface medicine cabinet, you can install a recessed one, and if you have a recessed medicine cabinet you can install a surface one. Installing a recessed bathroom medicine cabinet where you currently have a surface mounted cabinet will require a great deal more time and work – but installing a surface cabinet where you had a recessed cabinet is not as time-consuming. You’ll find an amazing array of designs available, so take some time to find something you want to wake up to every morning. If a unique design is imperative, simply buy a standard cabinet, then add your own lighting and frame to surround it.

If you’re taking on this home improvement project yourself, you’ll need a drill, a screwdriver, a level, a tape measure, and hammer. If your old or new medicine cabinet has lighting attached, remember that the first most important thing you need to do is to shut off the power from the service panel so you don’t get electrocuted before you get the chance to see your new bathroom medicine cabinet installed.

To take off your old medicine cabinet, disconnect the wires if there are any, then remove the screws that are holding the cabinet to the wall. You can then carefully pull the cabinet up and out from the wall. In many cases, a light fixture or wood frame may be attached separately from the cabinet structure.

Before you set your new medicine cabinet completely in place, place it in its new spot and make sure it’s level. (It’s a lot easier if someone can hold it for you.) Then look for the holes in the new cabinet where the screws will go. Make a mark on the wall through those holes onto the wall so you know where you will begin drilling.

If you’re surface mounting a cabinet, you’ll need wall anchors. Plastic anchors are not strong enough for larger cabinets installed on drywall. If your new medicine cabinet is recessed, it can be screwed directly into the wall. The types of screws and drill bits you use will also depend on the type of bathroom wall material you are working with. A masonry drill bit will be needed for tiled walls (and you’ll need a bit more arm strength).

If you’re installing a recessed cabinet, make sure the screws go into the wall studs or the cabinet will fall down the first time the mirror is slammed shut. (And maybe even before then.) For a surface cabinet, first install the anchors into the wall, then hold up the cabinet to its new position, and drive the screws through the back of the cabinet into the wall anchors – but don’t tighten them one by one. Start each one into the anchor, then after all of the screws are started into the anchors, drive each one in tight. Once the basic cabinet is installed, you can continue your project by hooking up your charming new lighting or adding a stunning frame around your new cabinet.

Seeing a new bathroom medicine cabinet installed can rejuvenate your mornings. If you can’t start a major home improvement project, start with installing a new bathroom medicine cabinet and greet yourself with a smile for a job well done.