Categories Living-Room

Living Room Remodeling Ideas for Chicago Homes in 2025

Living Room Remodeling Ideas for Chicago Homes in 2025: Modern, Functional, and Sustainable Spaces

Transform your living room with modern, functional, and sustainable remodeling ideas designed specifically for Chicago homes. Here’s a detailed guide to the top trends in 2025: 

1. Embrace Smart Living Room Technology 

Smart technology is revolutionizing living spaces, offering both convenience and cutting-edge design. In 2025, Chicago homeowners are integrating technology into their living rooms to make life easier while maintaining a sleek aesthetic.

  • Voice-controlled lighting systems allow you to adjust brightness and color without lifting a finger, perfect for setting the mood in any situation.
  • Smart thermostats keep your living room at the perfect temperature, whether you’re battling Chicago’s icy winters or humid summers, while saving energy.
  • Integrated entertainment systems ensure your TV, speakers, and devices are seamlessly connected, eliminating messy wires for a polished look.
  • Consider smart furniture, such as coffee tables with wireless charging pads or modular shelving units that adapt to your changing needs.
2. Focus on Energy Efficiency 

Energy efficiency is not only an environmentally conscious choice but also essential for reducing costs in Chicago’s unpredictable climate.

  • LED lighting mimics natural daylight, which is especially useful during Chicago’s long winter months, and reduces energy usage significantly. 
  • Replace traditional fireplaces with electric options that provide the same cozy ambiance without the maintenance or energy waste. 
  • Programmable thermostats help you regulate heating and cooling automatically, reducing energy waste during Chicago’s hot summers and cold winters. 
3. Choose Multi-Functional Furniture 

Chicago’s urban homes often require creative space management, making multi-functional furniture a must-have for 2025.

  • Modular sofas allow you to rearrange seating based on your needs, from everyday lounging to hosting guests. 
  • Coffee tables and ottomans with built-in storage help you keep clutter out of sight while maintaining a tidy, organized space. 
  • Expandable furniture like pull-out tables or chairs is ideal for condos or smaller homes, where flexibility is key to making the most of your living area. 
4. Incorporate Sustainable Design Elements 

Sustainability continues to be a top priority in 2025, with homeowners opting for eco-friendly materials and designs in their living rooms.

  • Reclaimed wood for coffee tables, shelving, or accent walls not only reduces waste but also adds a rustic charm that complements Chicago’s industrial vibe. 
  • Use non-toxic, VOC-free paints and finishes to improve indoor air quality and ensure your home is a healthy environment for your family. 
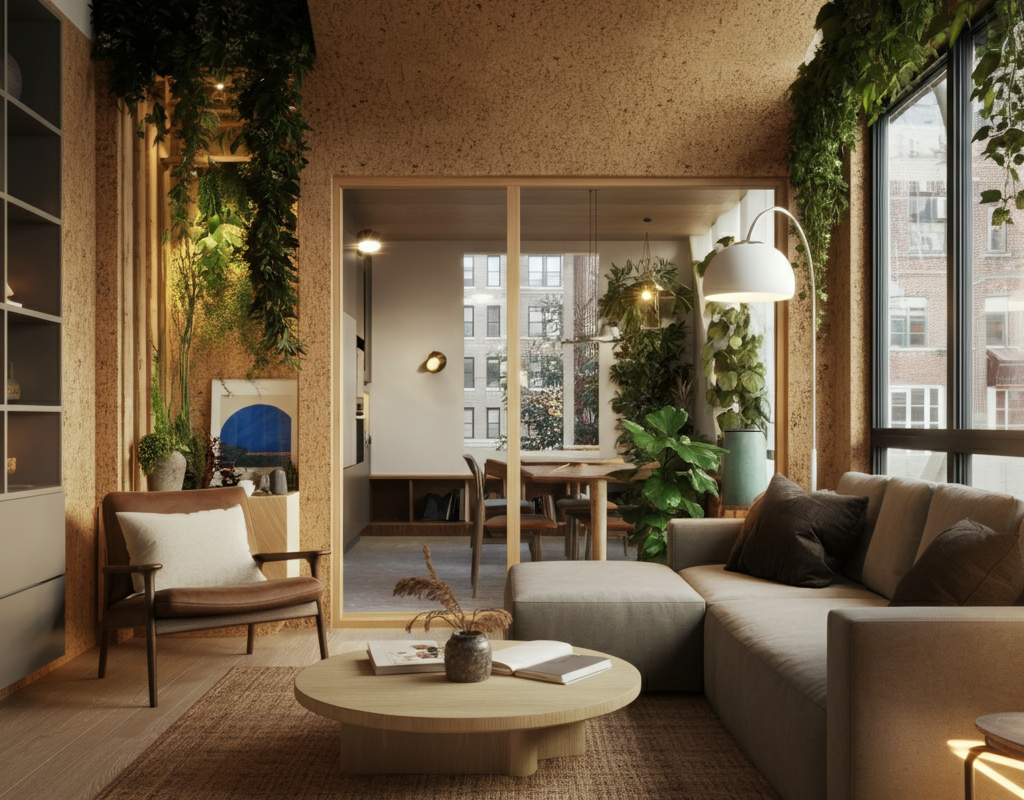
  • Indoor plants are both functional and decorative, improving air quality while adding a refreshing, natural aesthetic to your living space. 
5. Open Up the Space 

Open-concept layouts remain popular, particularly for urban homes where maximizing space is critical.

  • Removing non-structural walls can create a seamless flow between your living room, kitchen, and dining area, making the space feel larger and more inviting. 
  • Large windows or sliding glass doors let in natural light, brightening the space and connecting the living room to outdoor areas like patios or balconies. 
  • Open layouts allow you to define functional areas with rugs, furniture placement, or lighting rather than physical barriers. 
6. Update Colors and Textures 

Modern living rooms in 2025 are defined by a balance of neutral tones and bold accents, combined with textures that add depth to the space.

  • Neutral colors like beige, gray, and soft white create a calming foundation that works well with any decor style. 
  • Add personality with bold accent colors such as deep green, navy blue, or terracotta through furniture, throw pillows, or wall art. 
  • Textures like exposed brick, wood paneling, or textured wallpapers add character, reflecting Chicago’s urban-industrial aesthetic. 
7. Highlight Chicago’s Architectural Charm 

Chicago is known for its rich architectural history, and remodeling your living room in 2025 offers a chance to celebrate that charm while modernizing the space.

  • Restore or replicate classic elements like crown molding, baseboards, or wainscoting for a timeless, elegant look. 
  • Bay windows are a hallmark of Chicago homes—maximize their appeal with layered curtains or motorized shades that add both style and functionality. 
  • Incorporate industrial elements such as exposed steel beams, concrete accents, or brickwork to reflect Chicago’s industrial heritage while maintaining a modern edge. 
8. Adapt to Chicago’s Climate 

Remodeling your living room in Chicago requires solutions that can handle the city’s extreme weather fluctuations.

  • Insulated window treatments like thermal curtains or energy-efficient blinds help keep the cold out during winter and reduce heat during summer. 
  • Choose durable flooring materials like engineered hardwood or luxury vinyl, which resist warping and scratches caused by humidity and temperature changes. 
  • Add rugs or install heated flooring for extra comfort and warmth, making your living room cozy even during Chicago’s harsh winters. 

Elevate Your Living Room in 2025 

Your living room is the centerpiece of your home, and remodeling it with these ideas ensures it’s modern, functional, and tailored to your lifestyle. By incorporating smart technology, sustainable materials, and thoughtful designs, you can create a living space that is stylish, efficient, and uniquely suited to Chicago’s architectural charm and climate. 

Categories Living-Room

Kitchen Remodeling: What to Expect

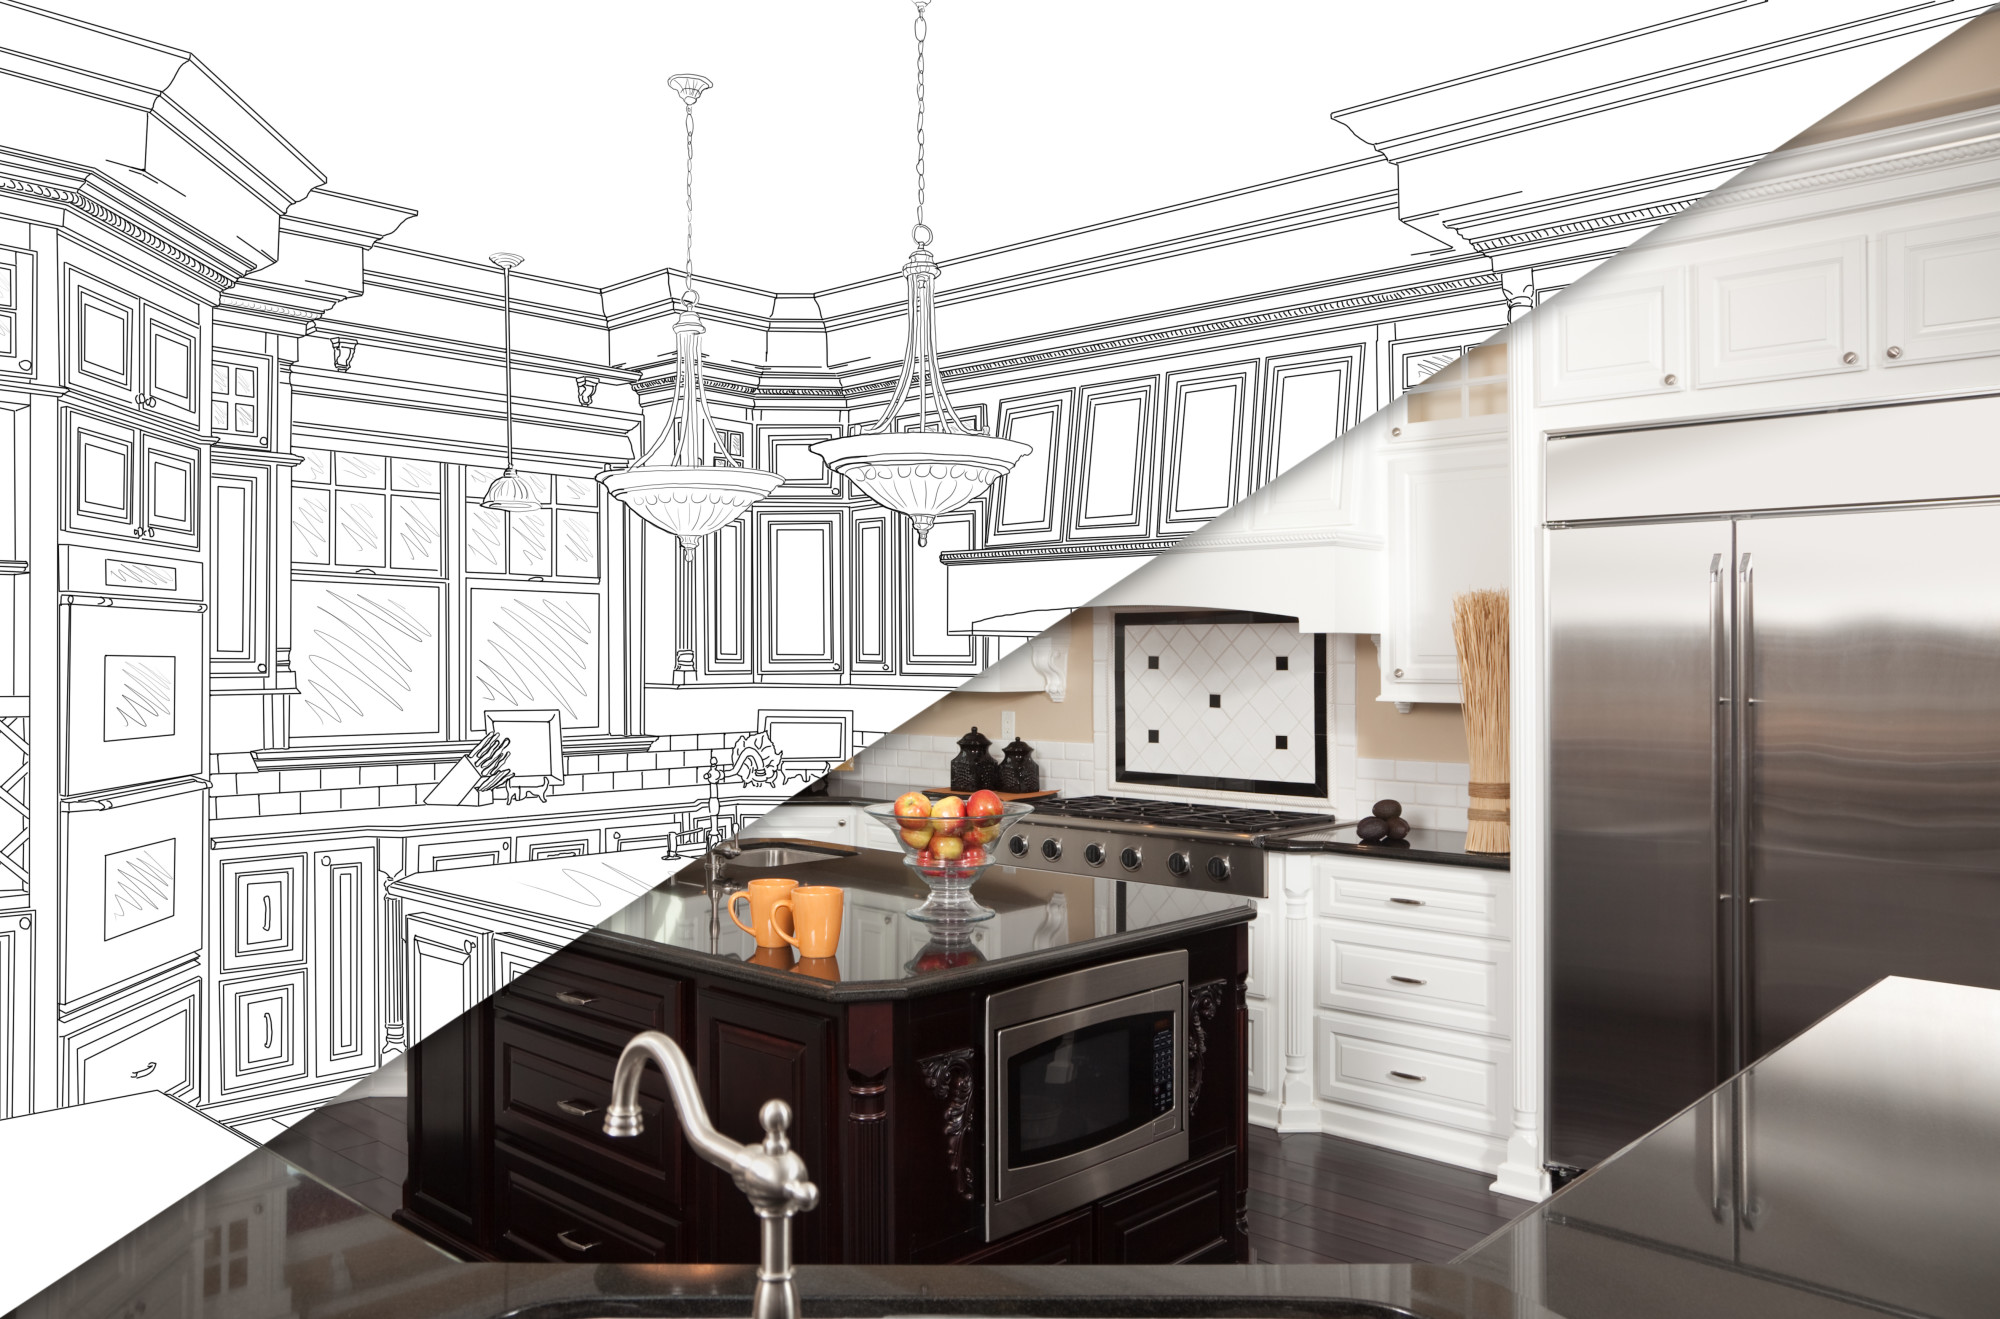
Remodeling a kitchen is an exciting yet complex project that involves several stages from initial planning to final execution. The process begins with budgeting, where you determine how much you are willing to spend, guiding the scope of your project. Gathering inspiration from magazines, websites, and social media helps in identifying styles, colors, and layouts that appeal to you. Hiring a professional kitchen designer or architect can assist in planning the layout and ensuring functionality, focusing on the work triangle—the distance between the stove, sink, and refrigerator—for efficient workflow. During the design phase, you'll select materials for countertops, cabinets, flooring, and backsplashes, considering durability, maintenance, and aesthetics. Deciding on energy-efficient appliances with the necessary features is also crucial.

Before construction begins, detailed planning and precise measurements of the kitchen space are essential. Obtaining necessary building permits and establishing a realistic timeline that accounts for potential delays will help keep the project on track. Choosing the right contractor involves researching, interviewing several candidates, checking references, and reviewing previous work. Once a contractor is selected, a detailed contract outlining the scope of work, timeline, and payment schedule should be signed.

kitchen remodeling

Demolition marks the beginning of the physical work, where the kitchen space is cleared of all items, including cabinets and appliances. Safety measures such as turning off water, gas, and electricity are crucial during this phase. Structural changes, if any, involve framing new walls and updating plumbing, followed by electrical work to install new wiring, outlets, and lighting according to the new design.

The construction phase continues with installing new flooring, cabinets, and countertops. Cabinets need to be level and securely attached, while countertops are measured and installed with precision. Adding a backsplash enhances the kitchen’s style and protects the walls from splashes. Fixtures and appliances come next, including task and ambient lighting, plumbing fixtures like sinks and faucets, and new appliances.

As the remodel nears completion, final touches like painting walls, installing trim and moldings, and adding hardware to cabinets and drawers are done. Post-construction involves a thorough cleanup to remove construction debris and a deep cleaning to eliminate dust and residue. A final walkthrough with the contractor ensures everything is completed to satisfaction, and any remaining tasks or touch-ups are addressed.

Once the remodel is complete, you can start moving in your kitchen items and enjoy the newly remodeled space. Clear communication with your contractor throughout the project, flexibility to handle unexpected issues and delays, and setting up a temporary kitchen in another part of your home can all contribute to a smooth remodeling process. Understanding these stages and preparing accordingly will help ensure a successful kitchen remodel that enhances both the functionality and aesthetics of your home.

Categories Living-Room

Transform Your Living Space: 12 Inspiring Living Room Remodeling Ideas

Are you looking to breathe new life into your living room? Whether your space needs a minor refresh or a major makeover, the right remodeling ideas can turn your living room into a beautiful and functional area that reflects your personal style and meets your everyday needs. From embracing the sleek lines of modern minimalism to creating a cozy bohemian retreat, there are endless ways to transform your space. In this guide, we explore 12 distinct living room styles that cater to a variety of tastes and lifestyles.

Each style is broken down with detailed elements and practical tips to help you seamlessly integrate these ideas into your home. Whether you're looking to create a tech-savvy lounge or a nature-inspired haven, get ready to find the inspiration you need to make your living room a place where comfort meets style. Let’s dive into these transformative ideas and start your journey to a more inviting living room!

living room remodeling
  1. Modern Minimalist:
    - Style Elements: Opt for a monochromatic color scheme with shades of white, gray, or black. Use streamlined furniture with minimal detailing.

    - Functional Features: Emphasize open spaces and natural light. Consider sleek, low-profile sofas, geometric coffee tables, and recessed lighting.

  2. Bohemian Chic:
    - Style Elements: Mix and match rich, vibrant colors like turquoise, mustard yellow, and deep red. Layer textiles like throw pillows, rugs, and tapestries.

    - Functional Features: Incorporate flexible seating arrangements, like floor cushions or a daybed, to create a relaxed atmosphere.

  3. Industrial Edge:
    - Style Elements: Use elements like exposed steel beams, distressed wood furniture, and concrete flooring. Metal pendant lights and vintage furniture can add character.

    - Functional Features: Open shelving units made of metal and wood can be both practical and decorative, adding to the industrial vibe.

  4. Scandinavian Simplicity:
    - Style Elements: Focus on functionality and simplicity with clean lines. Furniture is often low to the ground and features natural wood.

    - Functional Features: Use light-colored walls and large mirrors to make the space feel larger and brighter.

  5. Traditional Elegance:
    - Style Elements: Feature deep wood finishes, detailed moldings, and elegant furniture pieces like wingback chairs or a Chesterfield sofa.

    - Functional Features: Create a focal point with a large, ornate fireplace or a classic wood-paneled bookcase.

  6. High-Tech Lounge:
    - Style Elements: Modern, sleek furniture with smooth surfaces and minimalistic design. Color schemes are often neutral with bold accents.

    - Functional Features: Incorporate advanced technology like smart speakers, automated lighting systems, and modern entertainment centers.

  7. Rustic Retreat:
    - Style Elements: Use natural materials such as rough-hewn wood beams, distressed leather furniture, and cozy, thick-knit throws.

    - Functional Features: A stone fireplace can be a comforting centerpiece. Large, plush sofas offer a great place to relax.

  8. Coastal Breeze:
    - Style Elements: Decorate with light fabrics, driftwood accents, and shell or coastal-themed decor.

    - Functional Features: Opt for casual and comfortable furniture that invites relaxation. Window treatments should allow for plenty of natural light.

  9. Gallery Inspired:
    - Style Elements: Keep walls predominantly white to make artwork stand out. Minimalist shelves or picture ledges can be used to display pieces.

    - Functional Features: Use adjustable ceiling spotlights to highlight art and low-profile furniture that doesn't distract from the displayed works.

  10. Retro Revival:
    - Style Elements: Choose vibrant colors like orange, avocado green, and mustard yellow. Look for vintage or reproduction pieces from the era.

    - Functional Features: Incorporate iconic items like a Sputnik chandelier or a geometric bar cart. Use shag rugs and pop art for a fun touch.

  11. Luxurious Glam:
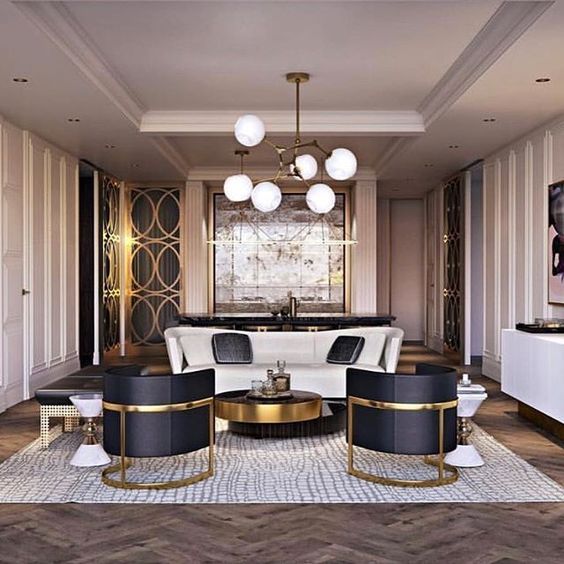
    - Style Elements: Use rich, opulent materials like crushed velvet and silk. Decorate with jewel tones and accents of gold or silver.

    - Functional Features: Add luxurious touches like an ornate mirror, crystal decanters, and plush throw pillows.

  12. Nature-Inspired:
    - Style Elements: Focus on materials and colors that evoke the outdoors, like stone, wood, and greens or browns.

    - Functional Features: Large windows or glass doors that open to outdoor views can reinforce the connection to nature. Include indoor water features for a soothing sound.

As we've explored a wide array of living room remodeling ideas, from the minimalist touch of Scandinavian design to the luxurious appeal of glam decor, it's clear that your living room is more than just a space—it's a canvas for your creativity and personal expression. Each style offers unique elements that can enhance your home’s ambiance and functionality. Remember, the best remodel combines aesthetic appeal with practicality, reflecting your lifestyle and personal taste.

Whether you're ready to undertake a full renovation or are looking for small updates that make a big impact, these ideas are designed to inspire and guide you through the process of transforming your living room into a place you love. Take the time to consider what feels right for your space and what will make it truly yours. Happy remodeling!

Categories Living-Room

Trim Your Room to Perfection with Plain Cove Molding

Cove molding isn't a necessity of life, and many houses are built without the benefit of having cove, crown or cornice molding installed. But installing cove molding adds architectural interest, visual continuity, and improves your home’s insulation. Cove molding joins walls and ceilings with a clean, simple line, creating a seamless transition that works to define a room. Installing cove molding is a relatively simple home improvement project that can add to the beauty and value of your home.

Cove molding is a “Plain Jane” when compared to the ornate cornices and stylish crown moldings that are available in wood, plaster, vinyl and even foam. But when cove molding is installed to join walls to a ceiling, it smoothes out the harsh lines between wall and ceiling and lets the eye continue to move fluidly throughout the room bringing uninterrupted attention to the focal points of the room.

Smaller rooms require thinner trim, and you can tame down an over-sized room with wide, thick molding and prominent cornices. If you have an uneven ceiling, you can find foam replicas of cornices and molding that are adhered with a latex adhesive caulk or nailed down or plaster cornices that are adhered with gypsum adhesive.

Leveling and measuring to ensure exactness are the greatest challenges when installing cove molding. Measure the gaps between the wall and ceiling, and make sure you use a carpenter's level. You will also want to locate the studs in the room before you start the job. Nailing the molding into the studs keeps the molding firmly attached. When you start installing the cove molding, start in one corner of the room and work your way towards the least noticeable part of the room.

For wood molding, attach it with 2” finish nails. To save yourself from trying to extract needle-thin finish nails, drive the nails in only partially before you countersink them. You should not only double-check your measurements with a level, but you should also get off your ladder or chair, and make sure that the trim is aligned straight. (It wouldn't hurt to ask for a second opinion.) Once you are confident that the molding is level, countersink the finishing nails, and if you'd like, fill in the nail heads with matching putty. To keep the trim sealed tight, fill in any gaps above or below the lines with sandable and paintable silicone adhesive. You can smooth out the silicone with your fingertip.

Sometimes even the simplest home improvement can make a pronounced difference. If your room needs fluidity, subtle architectural interest, or a tad more insulation – installing cove molding could be the simple home improvement project needed to trim your room to perfection.